
Last updated: June 25, 2026
Imagine you’ve spent months perfecting your Shopify store – the branding is sharp, the product photography is gorgeous, the copy converts. Then you check your Google PageSpeed score and see a 34 out of 100. Your bounce rate is climbing. Conversions are flatlining. The store looks brilliant, but it loads like it’s running on dial-up. This is where Shopify speed optimisation pays for itself, directly, in recovered sales.
A one-second delay in load time can reduce conversions by as much as 7% – though the actual impact depends heavily on your baseline speed and traffic source. For a store doing £10,000 a month, that’s potentially £700 gone [citation needed] before a single visitor clicks Add to Cart. The good news: most Shopify performance problems are fixable without rebuilding from scratch. Here’s the technical checklist that actually moves the needle – prioritised by what you should change this week, not someday.
Prerequisites – What You Need Before You Start

Image: thedesignsfirm.com
Before touching a single line of code, set yourself up to measure. You cannot optimise what you cannot quantify.
You’ll need access to Google PageSpeed Insights (free, measures Core Web Vitals – Google’s metrics for real-world page experience), GTmetrix or WebPageTest for waterfall analysis (a visual breakdown of every resource your page loads, and how long each takes), and Shopify’s own Theme Editor plus the Code Editor in your admin panel. You don’t need to be a Liquid (Shopify’s templating language) expert – but familiarity with HTML, CSS, and basic JavaScript will help. Run baseline tests before touching anything. Screenshot your scores. That before/after comparison will be your proof of work.
One more thing: check Google Search Console’s Core Web Vitals report alongside PageSpeed. PageSpeed simulates a connection; Search Console shows field data from real visitors. They can diverge substantially on mobile, and field data is what Google’s ranking signals actually use.
Step 1: Audit Your Theme Code
A bloated theme is the silent performance killer nobody talks about. A clean theme audit is your first move.
Open Shopify’s Code Editor and look at your theme.liquid file. Count the number of third-party scripts loading in the <head>. Every <script src="..."> tag in the document head is a render-blocking resource – it stops the browser building the visible page until that script finishes downloading. Move non-critical scripts to load with defer or async attributes. Better still, push them to just before the closing </body> tag if they don’t need to run at page start.
Check your CSS too. Themes like Debut or Dawn ship with generous default styles – most stores only use 40-60% of them. Tools like PurgeCSS can strip unused rules. Before: 800kb of CSS. After: 120kb. That’s a real-world example, not a hypothetical.
Section-level asset loading is a newer lever that Online Store 2.0 themes expose. Rather than loading every section’s JavaScript and CSS globally in theme.liquid, you can scope assets to the sections that actually need them using {% schema %} references and Shopify’s content_for_header injection. If your countdown timer only appears on the homepage, its 40kb script has no business loading on every product page. Dawn and other OS 2.0 themes handle this natively – if you’re on a legacy theme, this is a meaningful reason to consider migrating.
Step 2: Fix Your Font Loading Strategy
Fonts are a frequently overlooked performance cost. A store loading three custom font weights across two typefaces can add 300-500ms to Time to First Byte on a slow connection – before a single pixel of your design is visible.
The safest approach is font-display: swap in your CSS @font-face declarations. This tells the browser to render text immediately in a system font and swap to the custom font once it downloads, preventing an invisible-text flash that hurts both user experience and your LCP (Largest Contentful Paint) score. If you’re using Google Fonts via a <link> tag, add &display=swap to the URL. If you’re self-hosting font files (which avoids a third-party DNS lookup), preload the critical weights: <link rel="preload" href="/fonts/brand-regular.woff2" as="font" type="font/woff2" crossorigin>. Only preload the one or two weights that appear above the fold – preloading everything defeats the purpose.
Consolidate where you can. Two font families with two weights each is rarely worth the overhead versus one family with three weights, unless your design genuinely requires it.
Step 3: Optimise Every Image – and Prioritise Your LCP Image
Images are almost always the single largest performance win available. This is where most stores leave the most speed on the table. But the optimisation strategy isn’t uniform across all images – your hero image and your sixth-product-in-a-grid image need completely different treatment.
Shopify automatically serves images through its CDN (Content Delivery Network – a global network of servers that delivers files from a location close to each visitor), but it won’t compress or resize images you’ve uploaded at the wrong dimensions. A 4000×3000px product photo displayed at 600px wide is sending four times more data than needed. Use Shopify’s built-in image_url filter with size parameters in your Liquid templates: {{ product.featured_image | image_url: width: 800 }}.
For your LCP image – typically the hero banner or the first product image in a collection grid – do the opposite of lazy loading. Explicitly preload it: <link rel="preload" as="image" href="{{ section.settings.hero_image | image_url: width: 1200 }}" fetchpriority="high">. Add the fetchpriority="high" attribute to the <img> tag itself too. This signals to the browser that this image is critical and should be fetched ahead of lower-priority resources. On a real store, this change alone can shift LCP by 400-800ms.
For every other image below the fold, apply loading="lazy" – the browser will skip downloading them until the user scrolls near them. The rule is conditional, not universal: above the fold, prioritise; below the fold, defer.
For format, convert to WebP wherever possible. WebP files are typically 25-35% smaller than equivalent JPEGs with no visible quality loss [citation needed], though gains vary by image content. The Shopify app TinyIMG or Crush.pics handles bulk conversion without touching your theme code.
Step 4: Audit and Remove Apps – Understand How They Load
Here’s a myth worth busting: apps don’t slow stores down because of what they do in the background. They slow stores down because almost every Shopify app injects JavaScript and CSS into your storefront, whether or not that particular page needs it.
The key distinction in 2026 is between legacy script injection and theme app extensions. Legacy apps inject <script> tags directly into theme.liquid or layout/theme.liquid via ScriptTag API – those scripts load on every page, unconditionally. Newer apps built on Shopify’s Theme App Extensions architecture inject code as app blocks, which only load on sections where you’ve actually placed them. If you’re evaluating two apps that do the same job, prefer the one built on app extensions – it won’t penalise pages where you haven’t deployed it.
You can inspect your storefront’s script load in two places. In Theme Code, search for app.js or cdn.shopify.com/shopifycloud to find legacy injections. In Online Store > Theme > Customise > App Embeds, you’ll see a list of embed-style app blocks – toggles you can disable individually without uninstalling the app. This is the right first pass: disable app embeds you’re not actively using before committing to a full uninstall.
For apps you decide to remove entirely: uninstall them properly, then manually audit theme code for orphaned script tags. Shopify does not guarantee apps clean up after themselves, and a dormant <script> pointing to a decommissioned app endpoint still costs a DNS lookup.
A store with 15 apps will almost always underperform a store with 6 apps doing equivalent jobs – but the architecture of those apps matters as much as the count.
Step 5: Implement Lazy Loading and Defer Non-Critical Scripts
Lazy loading and script deferral are two sides of the same coin – both delay loading resources until they’re actually needed. With the LCP image handled in Step 3, this step covers everything else.
For scripts like live chat widgets, review carousels, and upsell popups, use the defer attribute: <script src="widget.js" defer></script>. This tells the browser to download the script in the background and only execute it after the page has finished parsing. For scripts that can load even later – say, a retargeting pixel or a social share button – wrap them in a DOMContentLoaded or load event listener so they fire after the initial render is complete.
This approach is particularly relevant if you’re considering a headless Shopify setup. Architectures that decouple the frontend – similar to the patterns covered in Headless WordPress: Decoupling Frontend and Backend – give you granular control over exactly what loads, when. More complexity up front, but significantly better performance ceiling.
Step 6: Leverage Shopify’s CDN and Browser Caching
Shopify hosts all theme assets – CSS, JavaScript, images – on its global CDN automatically. But you can still make poor decisions that undermine it.
Avoid self-hosting fonts from your own server when CDN-hosted alternatives exist with proper cache headers. Avoid loading libraries like jQuery from a local file when a CDN-hosted version is available. Check your <link> tags for any resources pointing to external servers with slow response times using the GTmetrix waterfall view – anything with a long DNS lookup time is a candidate for replacement or removal.
For stores running alongside a WooCommerce operation (the cost comparison of which is detailed in our WooCommerce Development Costs guide), the CDN advantage is one area where Shopify’s managed infrastructure genuinely shines compared to a self-managed WordPress stack.
Troubleshooting – Common Pitfalls
Scores improve in PageSpeed but not in real user data. PageSpeed uses a simulated connection. Check Google Search Console’s Core Web Vitals report for field data – that reflects actual visitors. The two can diverge significantly on mobile, so don’t optimise exclusively for the synthetic score.
Lazy loading breaks above-the-fold images. Never apply loading="lazy" to your hero image or the first product image in a grid. Apply it only to images that require scrolling to reach, and explicitly preload your LCP image with fetchpriority="high" as described in Step 3.
Removing an app leaves broken JavaScript errors in the console. Apps frequently leave orphaned <script> tags or global variable references in theme code after uninstallation. After removing any app, open browser DevTools, check the Console tab, and search theme code for the app’s name or domain to find and remove leftover tags manually. Also check the App Embeds panel – some apps register embed blocks that persist independently of the app listing.
Font swap causes layout shift. If font-display: swap produces a noticeable layout jump, your fallback system font has very different character widths to your custom font. Use a font metrics override tool to adjust the fallback font’s size-adjust, ascent-override, and descent-override properties – this makes the swap nearly invisible and avoids CLS (Cumulative Layout Shift) penalties.
Next Steps
Run your PageSpeed audit after each step – not at the end. Isolating changes lets you see which interventions deliver the most gain for your specific store. Prioritise LCP image preloading and app removal first; those two steps alone typically shift scores by 15-25 points. Theme code cleanup, section-scoped assets, and script deferral compound on top of that.
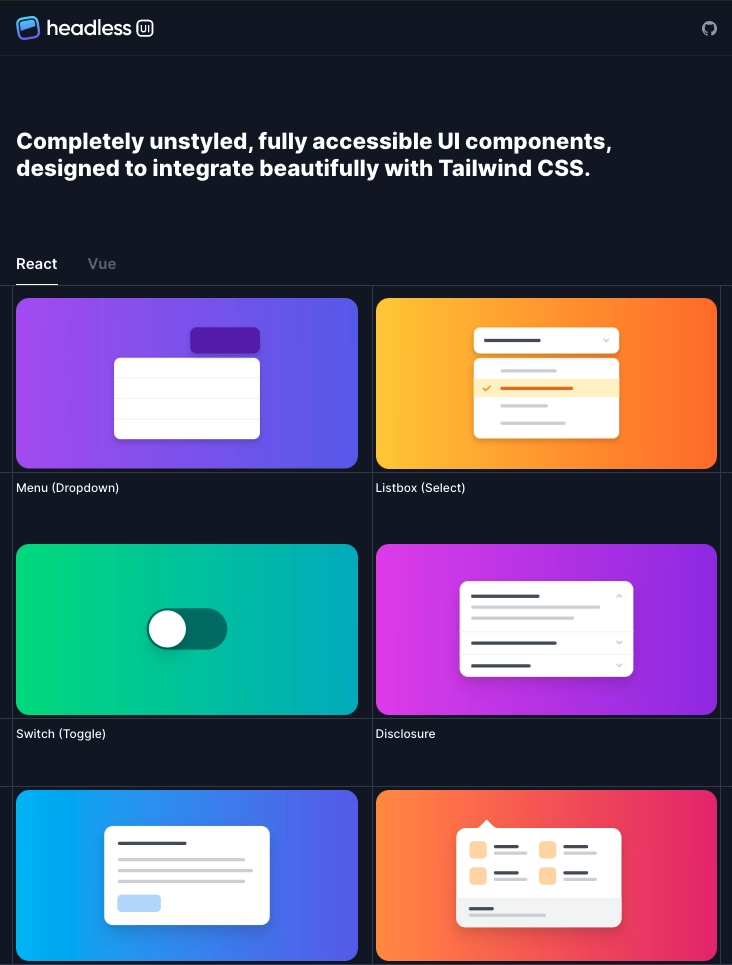
For stores that have outgrown standard Shopify theme customisation – where the performance ceiling is the theme architecture itself – a headless or custom-built storefront is the logical next step. If that’s where you’re headed, Headless UI components offer a route to lightweight, accessible interfaces without the overhead of a monolithic theme framework.
If you’re ready to push your store’s performance further than theme tweaks allow, DRS Web Development builds custom websites and web applications for businesses of all sizes – from performance-first Shopify builds to full bespoke ecommerce platforms. Get in touch for a free consultation.
Frequently Asked Questions
Q: What is a good Shopify speed score on Google PageSpeed Insights?
A: A score above 70 on mobile is considered good, with 90+ being excellent. Most untouched Shopify stores score between 30-60 on mobile due to app scripts and unoptimised images. Focus on mobile scores first, as Google uses mobile-first indexing – and cross-reference with the Core Web Vitals field data in Google Search Console, which reflects real visitor experience rather than a simulated test.
Q: How much do Shopify apps affect store speed?
A: It depends on how the app loads its code. Legacy apps using the ScriptTag API inject JavaScript and CSS on every storefront page, regardless of whether that page uses the app – and stores with 10+ such apps commonly see 2-4 second increases in Time to Interactive. Apps built on Theme App Extensions only load on sections where you’ve placed them, which is significantly more efficient. When evaluating apps, check which architecture they use.
Q: Does Shopify automatically optimise images?
A: Shopify serves images via its CDN and supports on-the-fly resizing through its Liquid image_url filter, but it does not automatically compress images you upload or convert them to modern formats like WebP. You need to either use the filter parameters in your theme code or use a third-party compression app. You’re also responsible for setting fetchpriority="high" on your LCP image – Shopify doesn’t do that for you.
Q: Will lazy loading images hurt my SEO?
A: No, when implemented correctly. Google’s crawlers support lazy loading and will index lazily-loaded images. The critical rule is not applying loading="lazy" to your hero or LCP image – delaying that load will hurt your LCP score, which is a confirmed ranking signal. Apply lazy loading only to images below the fold.
Q: What is the fastest way to improve a Shopify store’s speed?
A: Preload your LCP image with fetchpriority="high", audit and remove unused apps (checking App Embeds as well as installed app listings), then optimise image sizes and formats. These three steps together consistently produce the largest performance improvements with the least risk of breaking store functionality.
This article was researched and written with AI assistance, then reviewed for accuracy and quality. Riya Shah uses AI tools to help produce content faster while maintaining editorial standards.
Need help with your web project?
From one-day launches to full-scale builds, DRS Web Development delivers modern, fast websites.